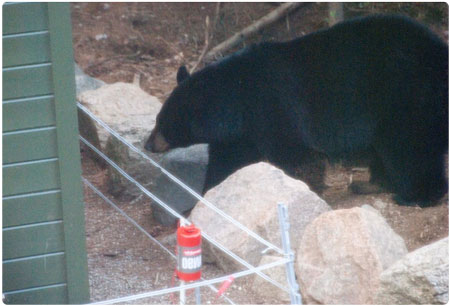
Electric fencing is a great way to protect beehives, chicken coops, livestock, and compost from bears.
Instead of waiting for a bear to cause damage and cost you money, invest in an electric fence that can give you peace of mind. Preventing bears from accessing your resources might even save that bears life, as food-conditioned bears often get hit by cars or shot if they create substantial damage or become a threat.
If you have no experience with electric fences, no fear! Below is a guide for what you need to ensure that you can give a bear the zap it needs to leave your property alone.
Step 1: Gather Supplies
You will need…
A fence, also called the conductor. There are different types of fences…
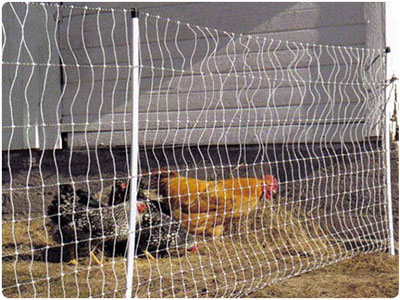
- Net fence - Best protection from bears and other predators because there are smaller gaps than in a rope, tape or wire fence. However, they are more expensive.
- Rope, tape or wire (high tensile or barbed) - We recommend at least four strands. The strands should sit at 4 inches, 16 inches, 26 inches and 36 inches from the ground. Barbed wire can be dangerous if a person or pet were to get caught on it.
An energizer to power your fence*
- Battery - Solar charged batteries are more expensive but use sunlight to charge themselves. Other batteries either require battery replacements or to be re-charged.
- Electrical - Your energizer would need to plug into a 110 V outlet. This is less expensive initially but requires you to use electricity.
*Tip: Look for an energizer that offers a minimum of 0.7 joules to effectively shock a bear.
Posts
These will hold your fence up. Make sure the fence is tightly strung between the posts to maximize stability and protection.
- Fiberglass or plastic posts can have the fencing wrapped directly around them.
- Metal or wooden posts require insulators so that you don’t ground out the fence and lose the charge.
Accessories
- Voltage tester to ensure your fence is working
- Surge protector to prevent lightning from burning out your energizer.
- Ground rod. To be most effective the fence should be grounded with at least one galvanized ground rod (galvanized means coated with zinc to prevent corrosion).
- Ground rod clamp to connect your ground rod to your fence.
- Nail on insulators so that wire is held away from wooden or metal posts.
- Warning sign to warn others of the electric fence.
- Fence alert, a light that flashes when the fence isn’t working properly.
- Gate handle to open the electric fence while it’s still on.
Starter Kits
For beginners, purchase a starter kit. Some conductors work best with certain energizers and accessories, so a kit ensures that your fence will be effective. Kits range from $300-$500 and can be found at some of the following locations:(these are just some suggestions and are not listed in any particular order)
- Hardware and farm supply stores near you
- www.tractorsupply.com/know-how_farm-ranch_fencing_electric-fencing
- www.premier1supplies.com
- www.wellscroft.com
- www.amazon.com
- www.zarebasystems.com
- www.kencove.com
- www.gallagherelectricfencing.com
- www.margosupplies.com/usa/electric-fencing
Step 2: Install
Kits will come with instructions on how to install, but otherwise you can use online tutorials
Video tutorials
- How to Use Electric Fencing to Secure your Outdoor Attractants
- How to Install Electric Fence for Bears
- Bear Smart Society: Electric Fencing
Step 3: Maintain
Bait Your Fence!
- Electric fencing is NOT EFFECTIVE against bears unless baited! Baiting lets the bear get a shock on its sensitive nose or mouth area and learn to stay away.
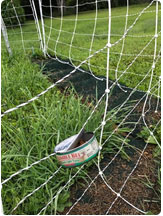
- Bait by coating one of your lower strands of your fence with peanut butter, bacon grease, or bacon strips. You could also partially open a can of tuna and wrap the lid around the strand.
- Make sure your fence is always freshly baited by replacing the bait every 3-14 days depending on what you’re using for bait (bacon would need to be replaced more than a can of tuna for example).
Cut the Grass
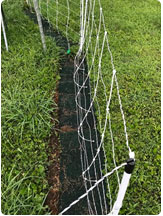
- Keep the vegetation surrounding your fence short do it does not interfere with the electrical current. If you have old carpet, cut it into strips and lay it underneath the wire to ensure that the grass does not grow in those areas.
Prevent Electrolysis
- Don’t combine different types of metals (i.e. steel wire and copper posts) to prevent electrolysis—a process that diminishes the charge of your fence.
Keep It Tight
- Make sure your fence is wound tight!
Real Quotes from Real Vermonters:
“We saw evidence of a bear trying to get into our coop—there were claw marks on the roof and it appeared it had been trying to pull the roof off, but then nothing else. It must’ve gotten shocked by the electric fence on its belly, because it hasn’t visited us since!” – Charlee
“I’ve never had an issue with bears but thought I’d install an electric fencing kit to protect my beehives before anything happened. It was super simple to install and hasn’t gotten in the way of my beekeeping whatsoever. I just turn it off when I need to work and make sure that I always have it baited, and I don’t have to worry about losing my bees to bears. I also stick my compost tumbler in the fence for simultaneous protection” - Forrest
“Bear pulled chicken wire off outside of chicken run and ate chicken food. It ran off when we banged on the porch. We installed electric fence. It came back, but once it hit the fence, it ran off.
 The kit was from Premier One. It included the electric poultry netting, stakes, the solar energizer and battery. The installation itself was simple. The only thing the kit was missing was a ground, so my husband just took an old piece of iron pipe and stuck it in the ground. The kit includes instructions (including how deep to embed the ground), and we just need to keep the grass along the fence line mowed so the charge isn't diluted…The system was not cheap, mainly because of the solar energizer and battery. If someone were to plug in to an outdoor plug, they would save a lot of money in the short run at least.” – Jocelyn
